In order to configure the GCP Scanner in CS360 for Cloud Security Scanning and User Threat Monitoring a Service User needs to be created.
Once you have completed this setup you will have the required authentication details to the scanner:
- Project ID
- Service Account email
- Service Account JSON key file
Step 1 – Enable the required APIs
1) Browse to https://console.cloud.google.com and sign in
2) Select the target Project from the project picker at the top of the page
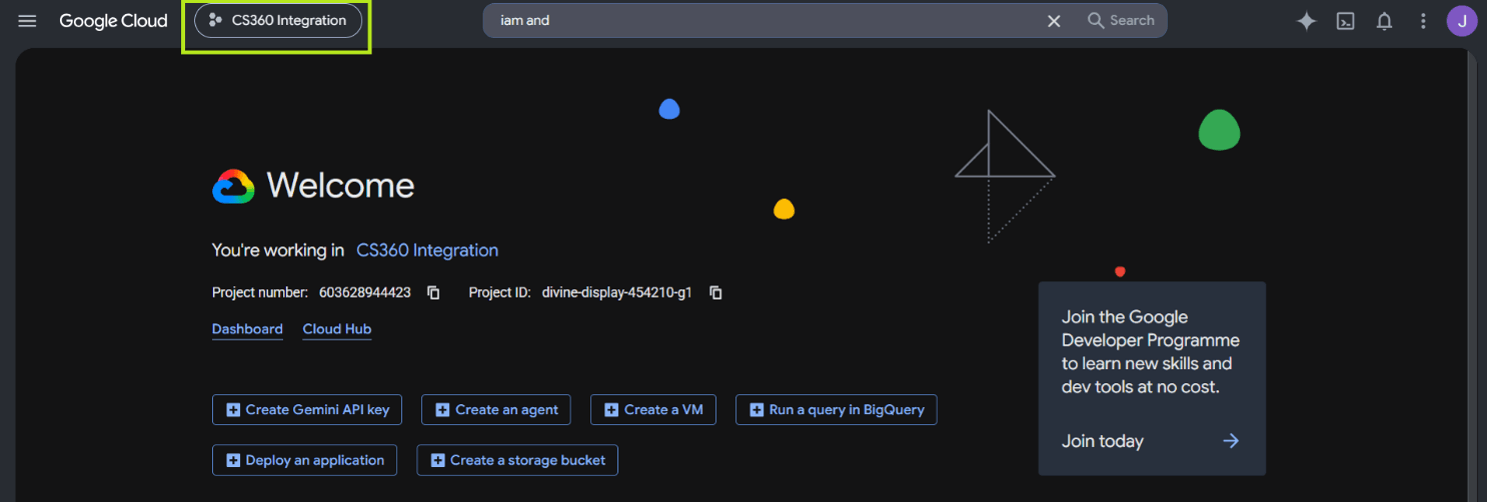
3) Navigate to APIs & Services > Enabled APIs & services and click + Enable APIs and services
4) Search for and enable each of the following:
- Cloud Resource Manager API – project and IAM policy enumeration
- Identity and Access Management (IAM) API – service account and role review
- Cloud Asset API – asset inventory across the project
- Compute Engine API – instances, disks, firewall rules and networks
- Cloud Storage API – bucket configuration and permissions
- Cloud SQL Admin API – database instance configuration
- Kubernetes Engine API – GKE cluster configuration (if in use)
- Cloud Logging API and Cloud Monitoring API – logging and alerting configuration
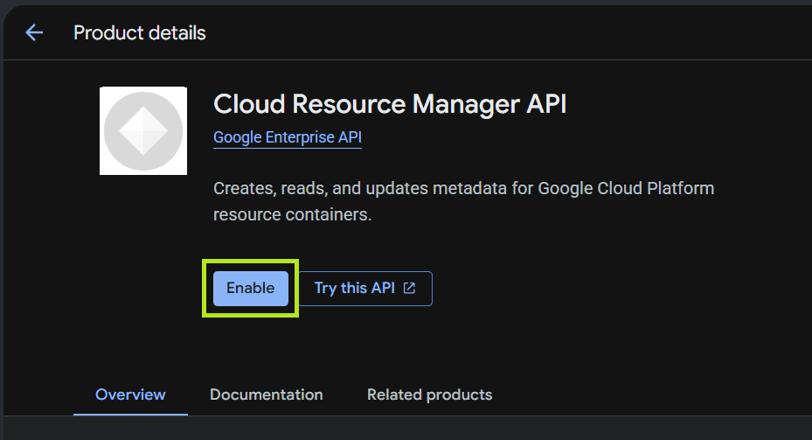
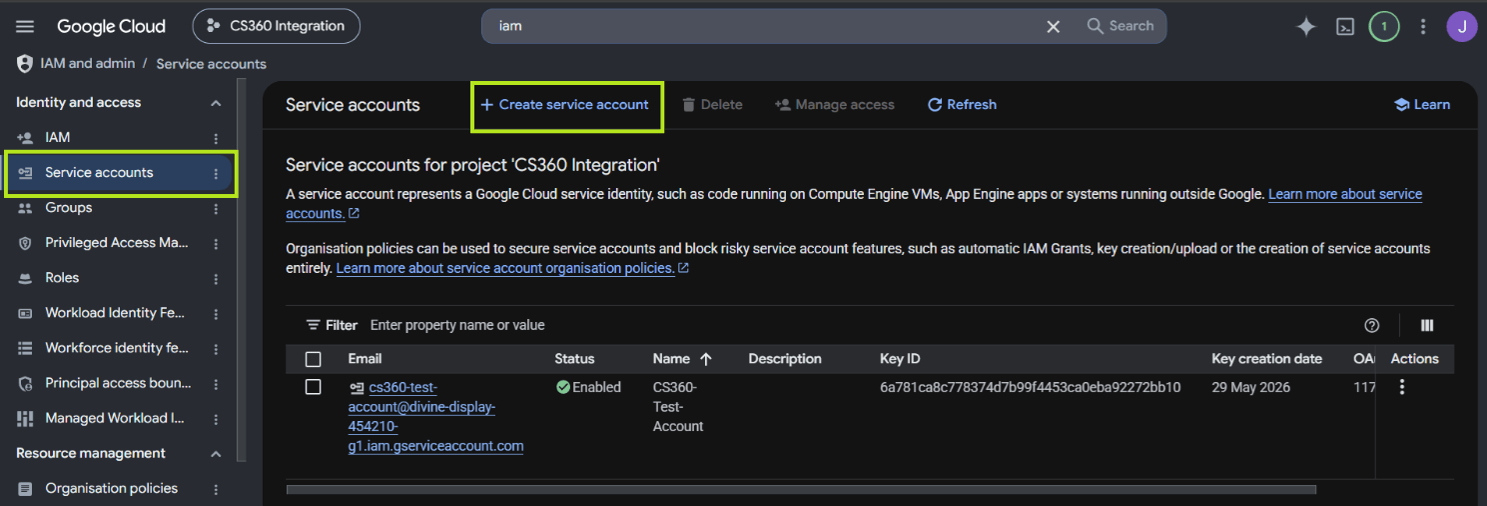
5) Navigate to IAM & Admin > Service Accounts
6) Click + Create Service Account
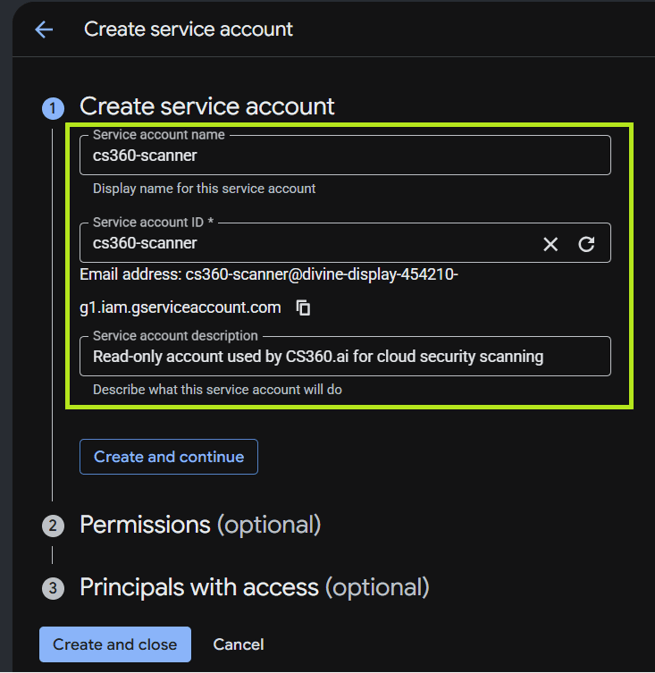
7) Enter the following and click Create and Continue:
- Service account name – cs360-scanner
- Service account ID – auto-populated as cs360-scanner
- Description – Read-only account used by CS360.ai for cloud security scanning
8) Under Grant this service account access to project, add the following roles:
- Viewer (roles/viewer) – read-only access to resource configuration
- Security Reviewer (roles/iam.securityReviewer) – read-only access to IAM policies
- Cloud Asset Viewer (roles/cloudasset.viewer) – asset inventory export
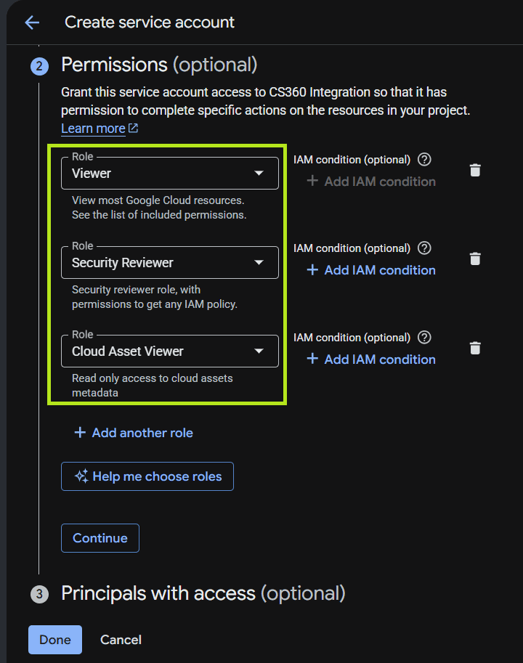
9) Click Continue, leave the Grant users access to this service account section blank, then click Done
Do not grant Editor or Owner. These allow changes to be made to your environment and are not required by CS360.
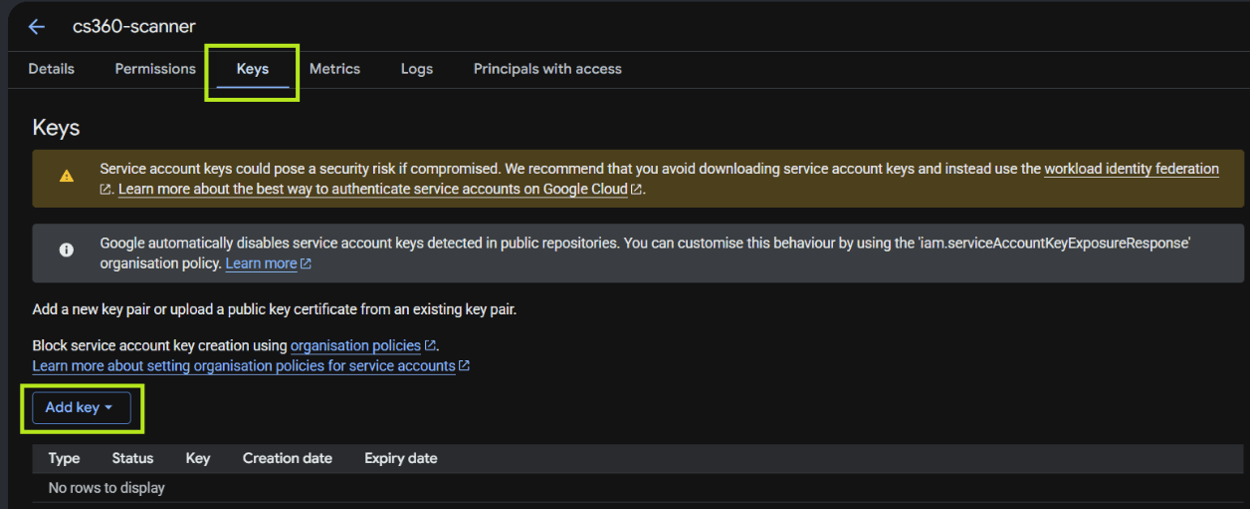
10) From the Service Accounts list, click the cs360-scanner account
11) Open the Keys tab and click Add Key > Create new key
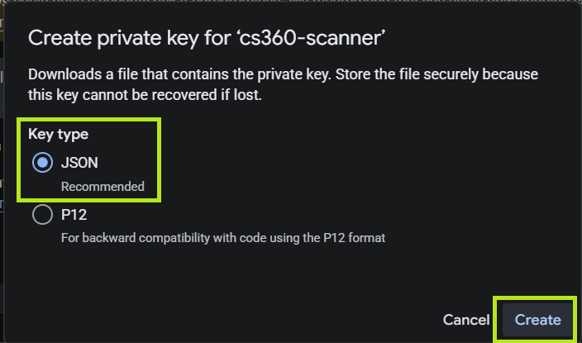
12) Select JSON as the key type and click Create
13) The key file downloads automatically – save it securely, as it cannot be downloaded again
If key creation is blocked, your organisation enforces the policy constraints/iam.disableServiceAccountKeyCreation. This must be relaxed for the project, or an exception added, before a key can be issued.
That’s it!
You should now have the required authentication details to configure each scanner:
- Project ID
- Service Account email
- Service Account JSON key file